Welcome to my Bird Blog!

Welcome to all my fellow bird lovers and gardeners! I'm so glad you stopped by.

Migratory bird populations have taken a nose dive in the past 40 years. But you can help bring their numbers back by creating beneficial, beautiful and fun habitats in your own backyard. Discover favorite plants and environments that shelter and feed colorful songbirds, as well as how to make them feel welcome by offering their preferred natural foods.

Grandma Pearl
(Connie Smith)

Tuesday, December 31, 2013

Basic Suet

Female Downy Woodpecker enjoying home made suet
by Grandma Pearl
Basic Homemade Suet is easy to make and more economical than buying commercial suet cakes.  Plus, you can be sure there are no harmful additives if you make it yourself.

You can find suet or beef fat trimmings at your local butcher shop, usually at a drastically reduced price.  Or, you can trim the fat from meat you cook yourself--save the fat scraps in a container and keep refrigerated until you are ready to render them.

Wild bird supply stores carry plain suet cakes that have already been rendered.  These can be used without any additions, or you can supplement them with bits of fruit, seeds or nutmeats to please your backyard birds.

If you choose to make your own suet from fat trimmings, here is the process:

1.  Cut the fat into small pieces, or use a food processor or meat grinder.
2.  In a deep saucepan, melt the fat OVER LOW HEAT.  Don't rush this step!  It is better to do this slowly than to risk a fire!  Treat it with respect as you do any cooking oil or other fat on the stove.
3.  Once the fat is completely melted, pour it slowly and carefully into molds or other containers.  Remember that the unmolded product will need to fit into your particular suet feeders.
4.  Allow to cool and then refrigerate for several hours.  Refrigeration causes the fat to solidify so it can be handled more easily.
5.  If you decide to add other ingredients to the suet, do that before pouring the suet into containers. 

These are some of the ingredients that I like to add:

  • small pieces of nuts like peanuts, pecans or walnuts
  • black oil sunflower seed
  • peanut butter
  • cracked corn or corn meal
  • oats, wheat or white flour
  • raisins, apple or other small fruit pieces, currants
Some of the birds that visit my suet feeders:

Monday, December 30, 2013

White Violets, Narcissus, Serviceberry Blossoms: It's All About White!

Delicate white violets show their purple splashed throats.
by Grandma Pearl

Today it is all about the white I see in Nature.


White violets are some of my earliest wildflowers to bloom.  To the Victorians white violets meant modesty and innocence,  honesty and humility; the religious connotation is that of faithfulness and spiritual understanding, death and resurrection.
All kinds of bees and bee flies find these dainty flowers irresistible!


Male Hairy Woodpecker enjoying a bountiful breakfast.
by Grandma Pearl
This beautiful white and black male Hairy Woodpecker is looking over his ample choices for breakfast.  I purchased a small bag of fruit and nut bird seed mix and combined it with regular black oil sunflower seeds.  My birds are definitely enjoying the variety.  I also occasionally add pieces of day-old bread as a special treat.  Mr. Hairy obviously doesn't know what to choose first!


Coltsfoot, also known as coughwort,
is used as an expectorant for clearing the lungs of congestion.  It is often combined with other herbs such as marshmallow or horehound to relieve symptoms of asthma, bronchitis and colds and flu.  But recent research has connected the use of this herb to liver disease.
Coltsfoot was probably brought to North America from Europe by the colonists because of its usefulness as an herbal solution to lung problems.

This herb grows in groups in waste areas in early spring, and blooms even before the dandelions emerge and flower.  It is one of the first nectar sources used by honeybees.   Prized by birds as a soft lining for their nests, it appears at just the right time in the spring!
Its leaves resemble a horse's hoof, and fully mature only after the flower has withered.  All parts of the plant were used medicinally. Coltsfoot as a healing resource goes back to the ancient times of Pliny and Galen.

Arabis 'Snowcrop' perennial
by Grandma Pearl


Arabis 'Snowcrop' is one of my favorite little springtime perennials.  The delicate 4-petaled flowers are cold hardy and remain on the plant a long time. It grows in partial shade without a problem, and it is deer resistant.  Snowcrop prefers slightly moist soil, but will tolerate dry conditions as well.  Compact and showy, it makes a very pretty addition to a perennial garden.


White narcissus
by Grandma Pearl

Lovely and familiar, my narcissus stand proudly against the cool spring breezes without batting an eye!  They are reliable harbingers of the season with their sunny yellow centers.  Every day they greet me with a nod and a reflection of brilliant sunshine.  The squirrels scurry back and forth in my bulb garden without causing any injury to these hardy narcissus.  It is necessary to keep them behind a fence though, because the deer think they are just another part of the salad buffet around here!


Serviceberry Tree in full bloom.
by Grandma Pearl
The beautiful Serviceberry tree blooms with oceans of bright white flowers.  It has other names:  shadbush, shadblow and juneberry.  A gorgeous addition to your landscape it produces edible fruits that birds love.  The fruits resemble blueberries but have a very different flavor, and the seeds taste like almonds.  Serviceberries start out red and change to blue as they ripen.  Use them in the same recipes where you would use blueberries, if the birds leave any for you! 

Flowers bloom in May here, then fruits appear in June; which is also the time when shad (fish) start spawning, thus the alternative names.


Mama Chickadee will soon be tending her nestlings.
by Grandma Pearl
White and black chickadees chat happily among themselves while busily tending their nests.  My newest batch of chickadees should be hatching soon.  Several days ago I saw this little bird with a beakful of dandelion fluff.  I'm sure she used it to line her nest inside the bird house she has chosen for her babies' nursery.  Both the male and female spent 2 days gathering materials to add to the loose grass cup they made.  When the babies have hatched, I will attempt to carefully open the birdhouse and quietly take a picture of her brood.


Cherry Blossom up close.
by Grandma Pearl
 My cherry blossoms never cease to take my breath away!  Their delicate and fancy white petals surround a tiny pink rosette center.  What a lovely cloud of blooms they produce!  These are Nanking Cherries that I planted about ten years ago.  Last year they were held back by a snowy cold snap.  But this year they have recovered nicely.  I should have enough fruit for a tasty cherry cobbler soon!


White Quartz Rock
by Grandma Pearl


I have a collection of white quartz that I have found around here.  This piece that is about the size of a hen's egg will be added to my others.  It sparkles in the sunshine, but that doesn't really show up in this picture.  I have also found some sandstone with mica flecks.


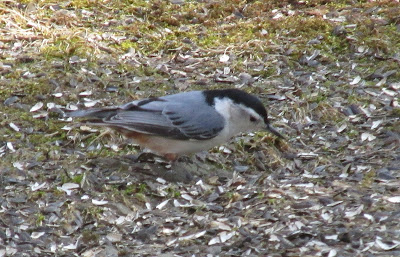
Nuthatch foraging under bird feeder
by Grandma Pearl
I love the little nuthatches with their white fronted tuxedo outfits!  They are snappy dressers for sure.  It's the contrast in colors that makes them so distinctive; that and their 'yank, yank,' call.  Acrobatic and agile, they forage under the bird feeders for seeds, and up and down trees for insects of all kinds.  They are year round visitors here, and always welcome in our neck of the woods!

Grandma Pearl
original post 5/13

 Nuthatches:  Little Devil Down Birds


Best Bird House Pole and How to Install It

Threaded Galvanized Conduit and threaded flange with screw holes
by Grandma Pearl
After a lot of trial and error, I have finally found the very best pole to use for installing a bird house or bird feeder.  And it comes from an unlikely place—the hardware store!  Go to the electrical department of your nearest big box hardware store and purchase inexpensive conduit about 10 feet long.  It’s made of galvanized metal, which helps it outlast the worst weather conditions, and it is sturdy.

 But the best part is that one end is already threaded.  In the same department, find a threaded flat metal flange with screw holes that will fit your pole.
 
What You’ll Need: 

 Bag of quick setting cement in which to permanently install your pole
·         Bucket in which to mix the cement
·         Shovel to mix cement
·         A level
·         Screw Drive
·         Wood Screws
Step By Step:

1.       Attach the flat metal flange to the bottom of your bird house with appropriate length wood screws.  Check to make sure the tip of the screws will not penetrate into the nest box itself, because the points might harm baby birds.
2.       Dig a hole at least 3 feet deep in your selected bird house location.  You may have to go deeper if you live in a region that has a deeper frost depth. 
3.       Attach your bird house by screwing the metal flange onto the threaded end of the pole. 
4.       Set your pole in the hole and use a level to make sure the pole is straight.
5.       Add some large stones to support the pole while you mix up your cement.
6.       Read the directions to properly mix your cement. 
7.       Once the cement is ready to pour, check for level once again, and as the cement goes in the hole.  Make adjustments as necessary.  It is very important that the pole be level all around so that the baby birds don’t fall out!

Most backyard birds that will use a bird house like to nest from 5 to 10 feet off the ground.  Keep that in mind when you buy your lengths of conduit.  Remember to add the depth of the hole to get your overall pole length.  I suggest 10 feet of threaded conduit, which gives you about 7 feet of height, plus 3 feet for the depth of the hole.

Your birds may not find their new house right away, but be patient!  Once they find it, you will enjoy the fun of watching all the activity as the babies are fed, and eventually learn to fly.


Thursday, December 26, 2013

Favorite Bird Feeders

A variety of birds enjoying a variety of bird feeders.
Image by Grandma Pearl

Some of My Happy Birds!

There are 5 birds in my picture above; can you find them all?  (Hint-the head is not visible on one of them.)

By the way, my bird feeder 'post' is actually an old speed bag holder my husband found alongside the road.  He thought he would eventually buy a new speed bag and use it, but I had other ideas!  It worked perfectly to hold a variety of feeders, and it has a heavy enough base so there is no danger it will fall over in the wind. My husband actually thought I was quite clever!  Evidently, he wasn't all that keen on using it himself after all.

I have several more feeders in another part of the yard, but these seem to be the favorite for many of my birds.  Instead of suet or peanut butter plugs, I use an offset spatula (the kind used for spreading cake icing) to fill the holes of the cedar suet log

(Suet Log Bird Feeder) with chunky peanut butter.  It was a hit from day 1!

The metal mesh feeder (No/No Red Seed Ball Wild Bird Feeder - RSB00343)
fills from the top and is also extremely popular with the smaller birds in my yard.  I have to fill it every 3 days!  They enjoy clinging to the mesh and swinging back and forth as birds land and fly off the round feeder.  I have also used these in my bird feeder wreaths, which keep the birds from colliding with my front windows.

And then there is the suet holder.  There is always at least one bird working at the suet.  It might be a woodpecker or a chickadee, a nuthatch or a titmouse.  It is occupied from dawn to dusk, especially in the colder weather.  All these feeders are inexpensive and draw a variety of birds to my yard in all seasons.

When there is fresh snow on the ground, I enjoy tossing sunflower seeds out for my ground feeding birds.  It's a joy to watch them gather and feed where I can observe them at close range.


Goldfinches and juncos searching in the snow for sunflower seeds.
Image by Grandma Pearl
Gold finches and juncos are the first ones on the scene;  they snatch up the seeds on the freshly fallen snow but never seem to have any squabbles among themselves.  It's not a good idea to scatter seeds on the ground if you have outdoor cats that might prey on your birds.

I plan on making a snowman when we have enough wet snow.  Then I'll add a dish to hold bird seeds and watch as my backyard birds have fun with their newest feeder!


Goldfinches are among the many birds that enjoy tube style seed feeders.
image by Grandma Pearl
This tube style feeder (Aspects 392 Quick-Clean Seed Tube Feeder, Medium - Brushed Nickel) in another part of the yard is always popular with goldfinches, titmice, chickadees, and purple finches.  In the cold months I fill it with a combination of black oil sunflower seeds and a fruit and nut mixture I found at the local tractor supply store.  That mixture also contains a little gravel to help the birds digest their food. 

My snow-covered bench--Guess I won't be sitting there anytime soon!
Image by Grandma Pearl

The more variety of feeders and types of food, the larger the variety of birds you will attract.  Also, don't forget to provide unfrozen water in your bird bath.  Those birds get thirsty and need to drink and bathe all year round, not just in the warmer months.  

Grandma Pearl

Best Feeders for Winter Birds
How Do Birds Stay Warm?
Myths About Wild Birds
Easy Ways to Provide Water in the Winter 


Thank You for Inspiring a New Generation of Bird Lovers


Here is a wonderful video from Cornell Lab of Ornithology, showing how a group effort can make a huge difference in bird populations and their survival rates.  It's only about 3 minutes long, but it is wonderful to watch.  Enjoy!


Grandma Pearl

Wednesday, December 18, 2013

Five Ways to Keep Predators Away From Baby Birds


Vulnerable robin's nest in an oak tree.
by Grandma Pearl

Nature can be harsh, especially when it comes to wild babies.  Newly laid eggs, nestlings and fledglings are particularly at risk because they are favorites of predators like other birds, raccoons, squirrels, feral cats, etc.  But you can give them a safer environment and a better chance at survival using the following easy solutions. 

*Remember not to use toxic chemicals in your environment.  They harm all life, including humans; plus they find their way into our water sources.  If you attract birds, you will not need poisons to be rid of insect pests.  But if you still feel you need to control the bug population, choose organic and non-toxic options.
  
1.  Make a bird nesting basket to camouflage and thus hide the baby birds.  Click here for the 5 easy steps.
Make a bird nesting basket using my 5 easy steps.
by Grandma Pearl


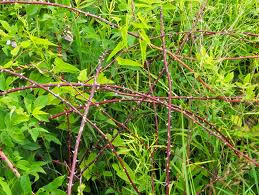
2.  Plant a briar patch.  You'd be surprised how many birds are attracted to thorny berry plants.  In addition to being a great food source, the sharp tangles discourage even the most persistent predator.  It doesn't have to be a large patch to make a huge difference.  Find out more here.
Briar patches don't need to be large to help birds.
by Grandma Pearl


3.  Climbing Rose Bushes offer another type of shelter with built-in predator resistance.  Not only that, but these bushes are home to bugs relished by backyard birds.  Cardinals are especially fond of nesting in rose bushes.  Choose rose varieties that produce rose hips, and you will also be feeding birds all winter long.  Rose hips provide much needed nutrients not otherwise available during the wintertime.  Create Safe Bird Habitats With Climbing Roses  
Robin Hood Climbing Rose creates a dense tangle of thorny branches just right for hiding bird nests and baby birds
by Grandma Pearl


4.  Dense vines make excellent nesting sites for birds.  Tangled vines are easily accessible by birds, but are a natural deterrent for the predators that would make easy pickins' out of birds' eggs and bird babies.  See which vines work the best here
Wild grape vines will quickly grow to shelter bird nests in the future.
by Grandma Pearl


5.  Mount your birds houses right on your own house.  Birds like hawks don't like to venture too close to human habitats.  Other predators find it hard to reach the baby birds when the nest box is installed on a high vertical surface.  Install them on the non-windy side, and under an overhang if possible.  See how I used a climbing hydrangea vine to surround one of my bird houses here.  
bird house mounted on my house in my hydrangea vine
by Grandma Pearl


Grandma Pearl


Monday, November 25, 2013

The Importance of Providing Water for Wild Birds Year Round

My chickadees often visit this bird bath for a drink and a splash!
from Grandma Pearl

Water For The Birds

Wintertime is not only cold, but dry!  I can't tell you how many times I've used hand lotion the last couple of weeks; nor how much water I've swallowed.  The cold temperatures rob all the moisture from the air, inside and outside.  The humidity in my house goes from a normal of 55% way down to about 25 to 30%. 

The wildlife around us needs just as much water as we do.  In the wintertime when all water sources are frozen solid, or have dried up completely, our birds still need essential water to survive.  Snow on the ground can serve as a source for the birds, but it costs them valuable energy they need to stay warm.  In order to metabolize that snow, birds have to use up some of their energy stores.  So that means more time spent foraging for food.  And then there are often times when there is no snow on the ground, but temperatures are still below freezing.
That's where we come in--By adding an inexpensive de-icer to our bird bath or basin.  It can literally mean the difference between survival and doom for our feathered friends.  These devices are safe to be submerged, and they will not harm the birds in any way.  Use a UL listed outdoor-rated electric cord and plug that in to your de-icer.  It will keep the water at about 40 degrees.   You must make sure that there is water in the bird bath at all times, otherwise the de-icer will keep trying to warm the air.  That can lead to a 'fried' de-icer.

There are thermostatically-controlled bird bath heaters as well.  They shut off automatically when there is no water in the bird bath.  Alternatively, you can also find heated bird baths that have built-in de-icers.  If you live in a colder climate that receives a lot of sun in the winter, then you might want to consider a solar-powered bird bath.

Whatever you choose, remember to keep your bird bath filled with water all the time.  Birds will come to rely on your water source, and as a result you may see many birds you might not have seen before. Your yard will become a very popular spot in the neighborhood!

To learn more about different options and materials available for bird baths and de-icers, click here.


Tuesday, November 19, 2013

New Ideas For Feeding Birds in the Wintertime

Blue Jay at my feeder last winter
Grandma Pearl

Some unique bird feeding ideas from Birds & Blooms magazine, and me!

I have always fed my backyard birds all winter long.  In fact, I feed them year round!  Standard bird feeders are great, but I recently found a couple of different ideas for feeding birds from the newest Birds & Blooms magazine (december/january 2014), and thought I would share them with you.

A fun natural bird feeder involves making a snowman!  from Connie Banet Miller of Wolcottville, IN comes this great idea:
Build a snowman, give him a wide-brimmed hat and fashion some hands.  Add sunflower seeds to the hat brim and to the palms of his hands.  She says she has been able to get some great images of birds eating out of the palms of the snowman's hands!

Lindy Franklin of Plano, TX fills up paper cups with bird seeds and then tosses the cups out on top of the fresh snow.  I can imagine how much fun it would be to watch the birds retrieving goodies from the paper cups!

I like to save egg shells for the birds to use as seed holders.  My husband is a big egg eater, so there are always tons of egg shells around here.  After I wash them out and let them dry, I add bird seed mixed with fruit and nut bird mixture, place them on the tray feeder and watch the birds as they discover their treats.  The blue jays especially seem to love to carry off the empty shells!

In the fall when the acorns are plentiful, I collect the extras to store in a cool, dry place.  When snow covers the ground, I toss the acorns on top of the snow under the bird feeders.  Squirrels are happy to have the nuts, and sometimes I am lucky enough to attract some wild turkeys this way!
Grandma Pearl

Meet 'Persistent Q. Squirrel', always ready to grab a free handout!
Grandma Pearl

Friday, November 15, 2013

Homemade Peanut Butter Bird Treat Recipe


Nuthatch loves homemade peanut butter treat
from Grandma Pearl

Birds Can't Resist This Peanut Butter Treat!

Very Best Easy Peanut Butter Bird Treat

Prep. Time:  5 min.
Cooking Time:  15 min.
Total Time:  20 min.

Ingredients:

* ½ c. crunchy or smooth peanut butter
* ½ c. shortening
* ½ c. flour
* 1-½ c. cornmeal
* ½ c. cracked corn
* ½ c. black oil sunflower seeds
* ¼ c. raisins or currants
* ¼ c. dried apricots, apples or cherries

Clean plastic containers. . . I use yogurt cups, but any small plastic container will do just fine.

Preparation:

In a saucepan over low heat, melt peanut butter and shortening.  Stir in cornmeal and flour until combined.  Add cracked corn and sunflower seeds.  Remove from heat and mix in raisins, currants, and dried fruit.

Transfer to plastic cups and allow to cool.  Refrigerate overnight and serve to your hungry, grateful birds!  You can use an offset spatula to fill the holes of a suet log with this yummy mixture.  Freeze any extra for later use.
Peanut Butter Bird Treat is very popular with the birds!
from Grandma Pearl


This recipe was inspired by Laura Klappenbach’s ‘Simply Nutty Bird Treat’ at About.com Guide

Grandma Pearl
Suet Log 

Tuesday, November 12, 2013

Peanut Bird Feeder Wreath from Songbird Essentials

Whole Peanut Wreath Feeder

 I bought this feeder about a month ago, and was a little skeptical about the birds actually using it.  My fears were unfounded, as it took only a day for the woodpeckers to find it!  They have been regular visitors ever since.  Both the downy and hairy woodpeckers work at it constantly.  But they don't pluck each peanut out individually, rather they peck at the shells and pull out the nuts inside.


The wreath measures 12" in diameter, and is like a heavy-duty slinky with hooks that are connected to the central hanging hook.  The spacing is just right so that the peanuts do not automatically fall out, but can easily be plucked out by birds like blue jays.  I filled it with unsalted whole shell peanuts, which I was very lucky to find on sale at my local grocery store!  In fact, I picked up several bags at the sale price to keep my birds in peanuts throughout the winter months.


I have really enjoyed watching my birds using this new feeder.  The natural fats found in the peanuts help keep their feathers in good condition, and also help to maintain their body heat at optimum levels even in the coldest weather.  I think it was a good investment and a great addition to my backyard bird feeders!

Tuesday, November 5, 2013

How to Make a Holiday Bird Feeder Wreath and Stop Window Collisions

Chickadees enjoy grabbing seeds from these mesh feeders.
Photo by Grandma Pearl

Here's a Fun Project that will keep your birds from colliding with your windows, while you enjoy watching their antics!

Have you ever heard that heart-sinking ‘thud’ against your window; and you know immediately that one of your beautiful birds has met with a terrible fate?  Here’s a beautiful and easy idea to keep this from happening again.


Items you will need to make this easy bird feeder wreath.
Photo by Grandma Pearl
  • What you will need:

·         Scroll-type or other planter hanger installed on or above your outside window frame.     
·         Large grapevine or other wreath form—at least 24 inches across
·         A thickness of newspaper to cushion and protect your work surface
·         Wire cutters if working with silk flowers
·         Gloves
·         ‘S’ hook or flexible wire for making a hanging loop
·         Seasonal floral stems, or real holly or other evergreen branches
·         Seed ball, metal mesh, approx. 6” diameter, or other small bird feeder that can be hung inside the wreath   (I found mine at Amazon.com--click here)


Make sure your plant/wreath hanger is long enough to accommodate the thickness of your wreath plus the hanging bird feeder, so that birds have room to easily access the feeder.

How to Make a Seasonal Bird Feeder Wreath, Step by Step:

1.     1.         Lay thickness of newspapers on a flat work surface.  (Hint:  If you can do this outside, you will have a lot less cleanup to do!)
2.       Test fit your wreath to see which way you want it to hang.  Sometimes wreaths can be a little out of round or less full in one spot or another.  Fitting prior to working with it will prevent the ‘I wishes’;  ‘I wish I had put the hanger in another spot’, or ‘I wish the fullest part of the wreath had been on the bottom’, etc.
3.       Attach your ‘S’ hook through the desired spot on your wreath.  If you are using grapevine, make sure the hook is placed so that it will not slide around. 

         a.       If you are using wire to make your own hanging loop, measure approximately 8 inches of wire and snip with wire cutters.  Feed wire through the top of your wreath and twist the ends together to secure the loop.  Hide the twisted ends inside the wreath, if desired.
4.       If you purchased floral stems in a ‘bush’ or garland,  use your wire cutters to detach each stem from the bush as illustrated.  Garlands of holly and pine cones or poinsettias can be cut apart for use in this type of wreath.  Be sure to leave a long enough length to weave securely into the wreath form.
5.       I have holly bushes growing in my yard, so that is what I used.   If you have evergreen shrubs that you wish to incorporate into your wreath, cut the stems to lengths of 8” to 12” for a more natural look and ease of positioning into your form.
  
I have holly bushes, but you can add any real evergreens, or artificial floral stems you wish.
Photo by Grandma Pearl

6.        Envision a triangle overlaid on top of your wreath.  Start adding your stems at one of the 3 points of that virtual triangle.  Then go to the next point and then the third.  Fill in between those areas with more stems.  You can make your wreath as full or as sparse as you want—you are the designer and you cannot mess it up!
7.       When you are happy with the look of your creation, hang your bird feeder from the top inside of the wreath.

 
Finished Bird Feeder Wreath
Photo by Grandma Pearl

Other feeders that would work well with this window wreath:


  • Cedar log suet/peanut butter feeder
  • Hanging suet cage feeder
  • Hanging bird seed bell
  • Peanut butter/birdseed covered pine cones  ( Click Here for instructions)
  • Homemade popcorn ball*   easy recipe from food.com:  

Hint:  Add a hanging loop of thin jute twine as you form the popcorn balls, and before they harden.  
   
 I have enjoyed watching my birds from the comfort and warmth of my livingroom.  They visit these feeder wreaths regularly, and put on an interesting show.  My most frequent visitors are the chickadees and small woodpeckers.

The floral stems you use can be changed out seasonally, or for different holidays.  Either way, your birds will benefit greatly.
It is important to note that you will be refilling your bird feeder on a regular basis.   So make sure your wreath can be easily accessed to replenish seeds or any other nutritious foods you are offering to your birds.
After hanging my wreaths, it took my birds about a day to find them.  Since then, they have been regular visitors.  And the most important part:  NO BIRDS HAVE FLOWN INTO MY WINDOWS SINCE I HUNG UP MY BIRD FEEDER WREATHS!
Enjoy!